

How to setup an AWS s3 bucket to upload files from a react and typescript app (PART 1).


Introduction
For those of you guys not familiar with AWS S3 an acronym for Amazon web service (AWS) Simple Storage Service (S3). AWS according to the source (what-is-aws) is a comprehensive and broadly adopted cloud platform that offers over 200 fully-featured services from data centers globally. Simple Storage Service (S3) is a service offered by Amazon Web Services that provides object storage through a web service interface and we will learn how to use S3 to store files uploaded from our frontend app.
Over the past couple of years, I've been using AWS s3 for file uploads, and every time I try to configure it to work from a Reactjs app it quickly becomes a thing that I struggle with. If you also have this recurring nightmare as I do then you are in the right place because this time I took the time to properly understand and familiarise myself with the whats, and hows of AWS s3 and teach you guys including my future self how to do it with ease.
Understanding the AWS jargon.
Before we dive right into the hows, I'd like us to take a step back to understand the terms you will come across when setting up your simple storage service.
Amazon Resource Names (ARNs)
ARNs uniquely identify AWS resources. We require an ARN when you need to specify a resource unambiguously across all of AWS, such as in IAM policies, Amazon Relational Database Service (Amazon RDS) tags, and API calls.
Basically, ARNs are IDs that represent any resources AWS provides, So let's say you created an Elastic Container Service (ECS), when that service has been created, AWS will automatically assign an ARN to it which will represent the service whenever it needs to be referred elsewhere within AWS.
ARNs usually follow these patterns.
arn:partition:service:region:account-id:resource-id
arn:partition:service:region:account-id:resource-type/resource-id
arn:partition:service:region:account-id:resource-type:resource-id
Read Amazon Resource Names (ARNs) for a deeper understanding of how it works.
Identity and Access Management (IAM)
IAM provides fine-grained access control across all of AWS. With IAM, you can specify who can access which services and resources, and under which conditions. With IAM policies, you manage permissions to your workforce and systems to ensure least-privilege permissions.
Simply put, IAM essentially allows you to give a user access to specific parts of a service and resource. Suppose we have a service you can read and write to, you can use IAM to give read policies/permissions to UserA and write policies/permission to UserB. Read Identity and Access Management (IAM) to learn more.
Polic(y | ies)
A policy is an object in AWS that, when associated with an entity or resource, defines its permissions. AWS evaluates these policies when a principal, such as a user, makes a request. Permissions in the policies determine whether the request is allowed or denied. Most policies are stored in AWS as JSON documents.
AWS policy when attached to an IAM identity or resources is what gives a principal, an AWS user in this case, the permission to perform an operation on that resource. It controls whether the principal can for instance perform get, put or delete on a resource. Read AWS Policies to learn more.
Bucket
An Amazon S3 bucket is a public cloud storage resource available in Amazon Web Services (AWS) Simple Storage Service (S3), an object storage offering. Amazon S3 buckets, which are similar to file folders, store objects, which consist of data and its descriptive metadata.
Access control list (ACL)
Amazon S3 access control lists (ACLs) enable you to manage access to buckets and objects. Each bucket and object has an ACL attached to it as a subresource. It defines which AWS accounts or groups are granted access and the type of access. When a request is received against a resource, Amazon S3 checks the corresponding ACL to verify that the requester has the necessary access permissions. Read Access control list (ACL) Overview to learn more.
Simple Storage Service (S3) set up.
Setting up s3 is quite simple and easy when you know exactly what you want and how to get it. We'd need an AWS account to get this done, I would assume you already have an AWS account. If you don't have one, log on to amazonaws to create one.
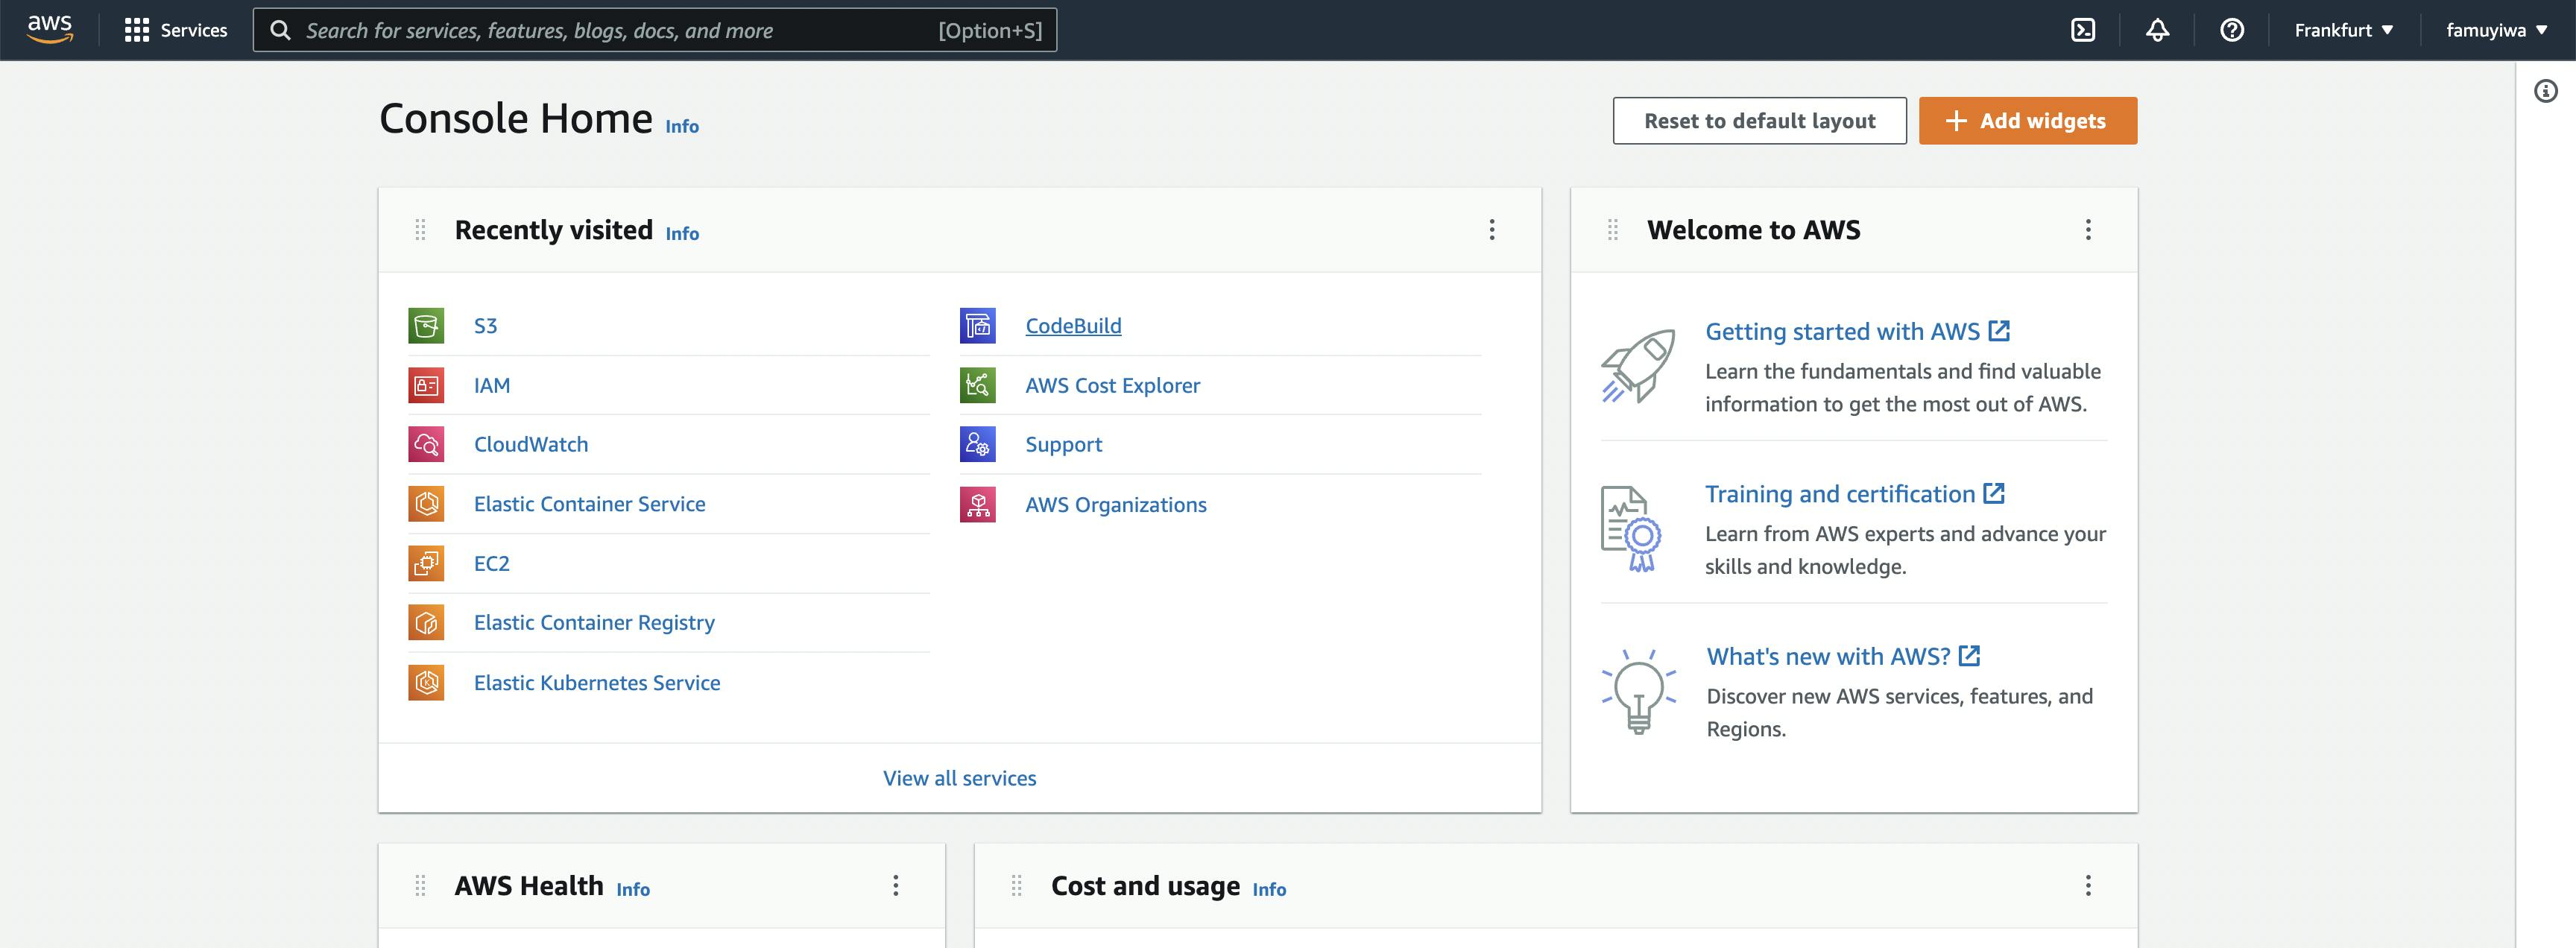
Sign in to your AWS console via amazonaws which should take you to your console dashboard, you will see something like the screenshot below or similar, don't worry about having exactly what's in the screenshot, it doesn't matter.
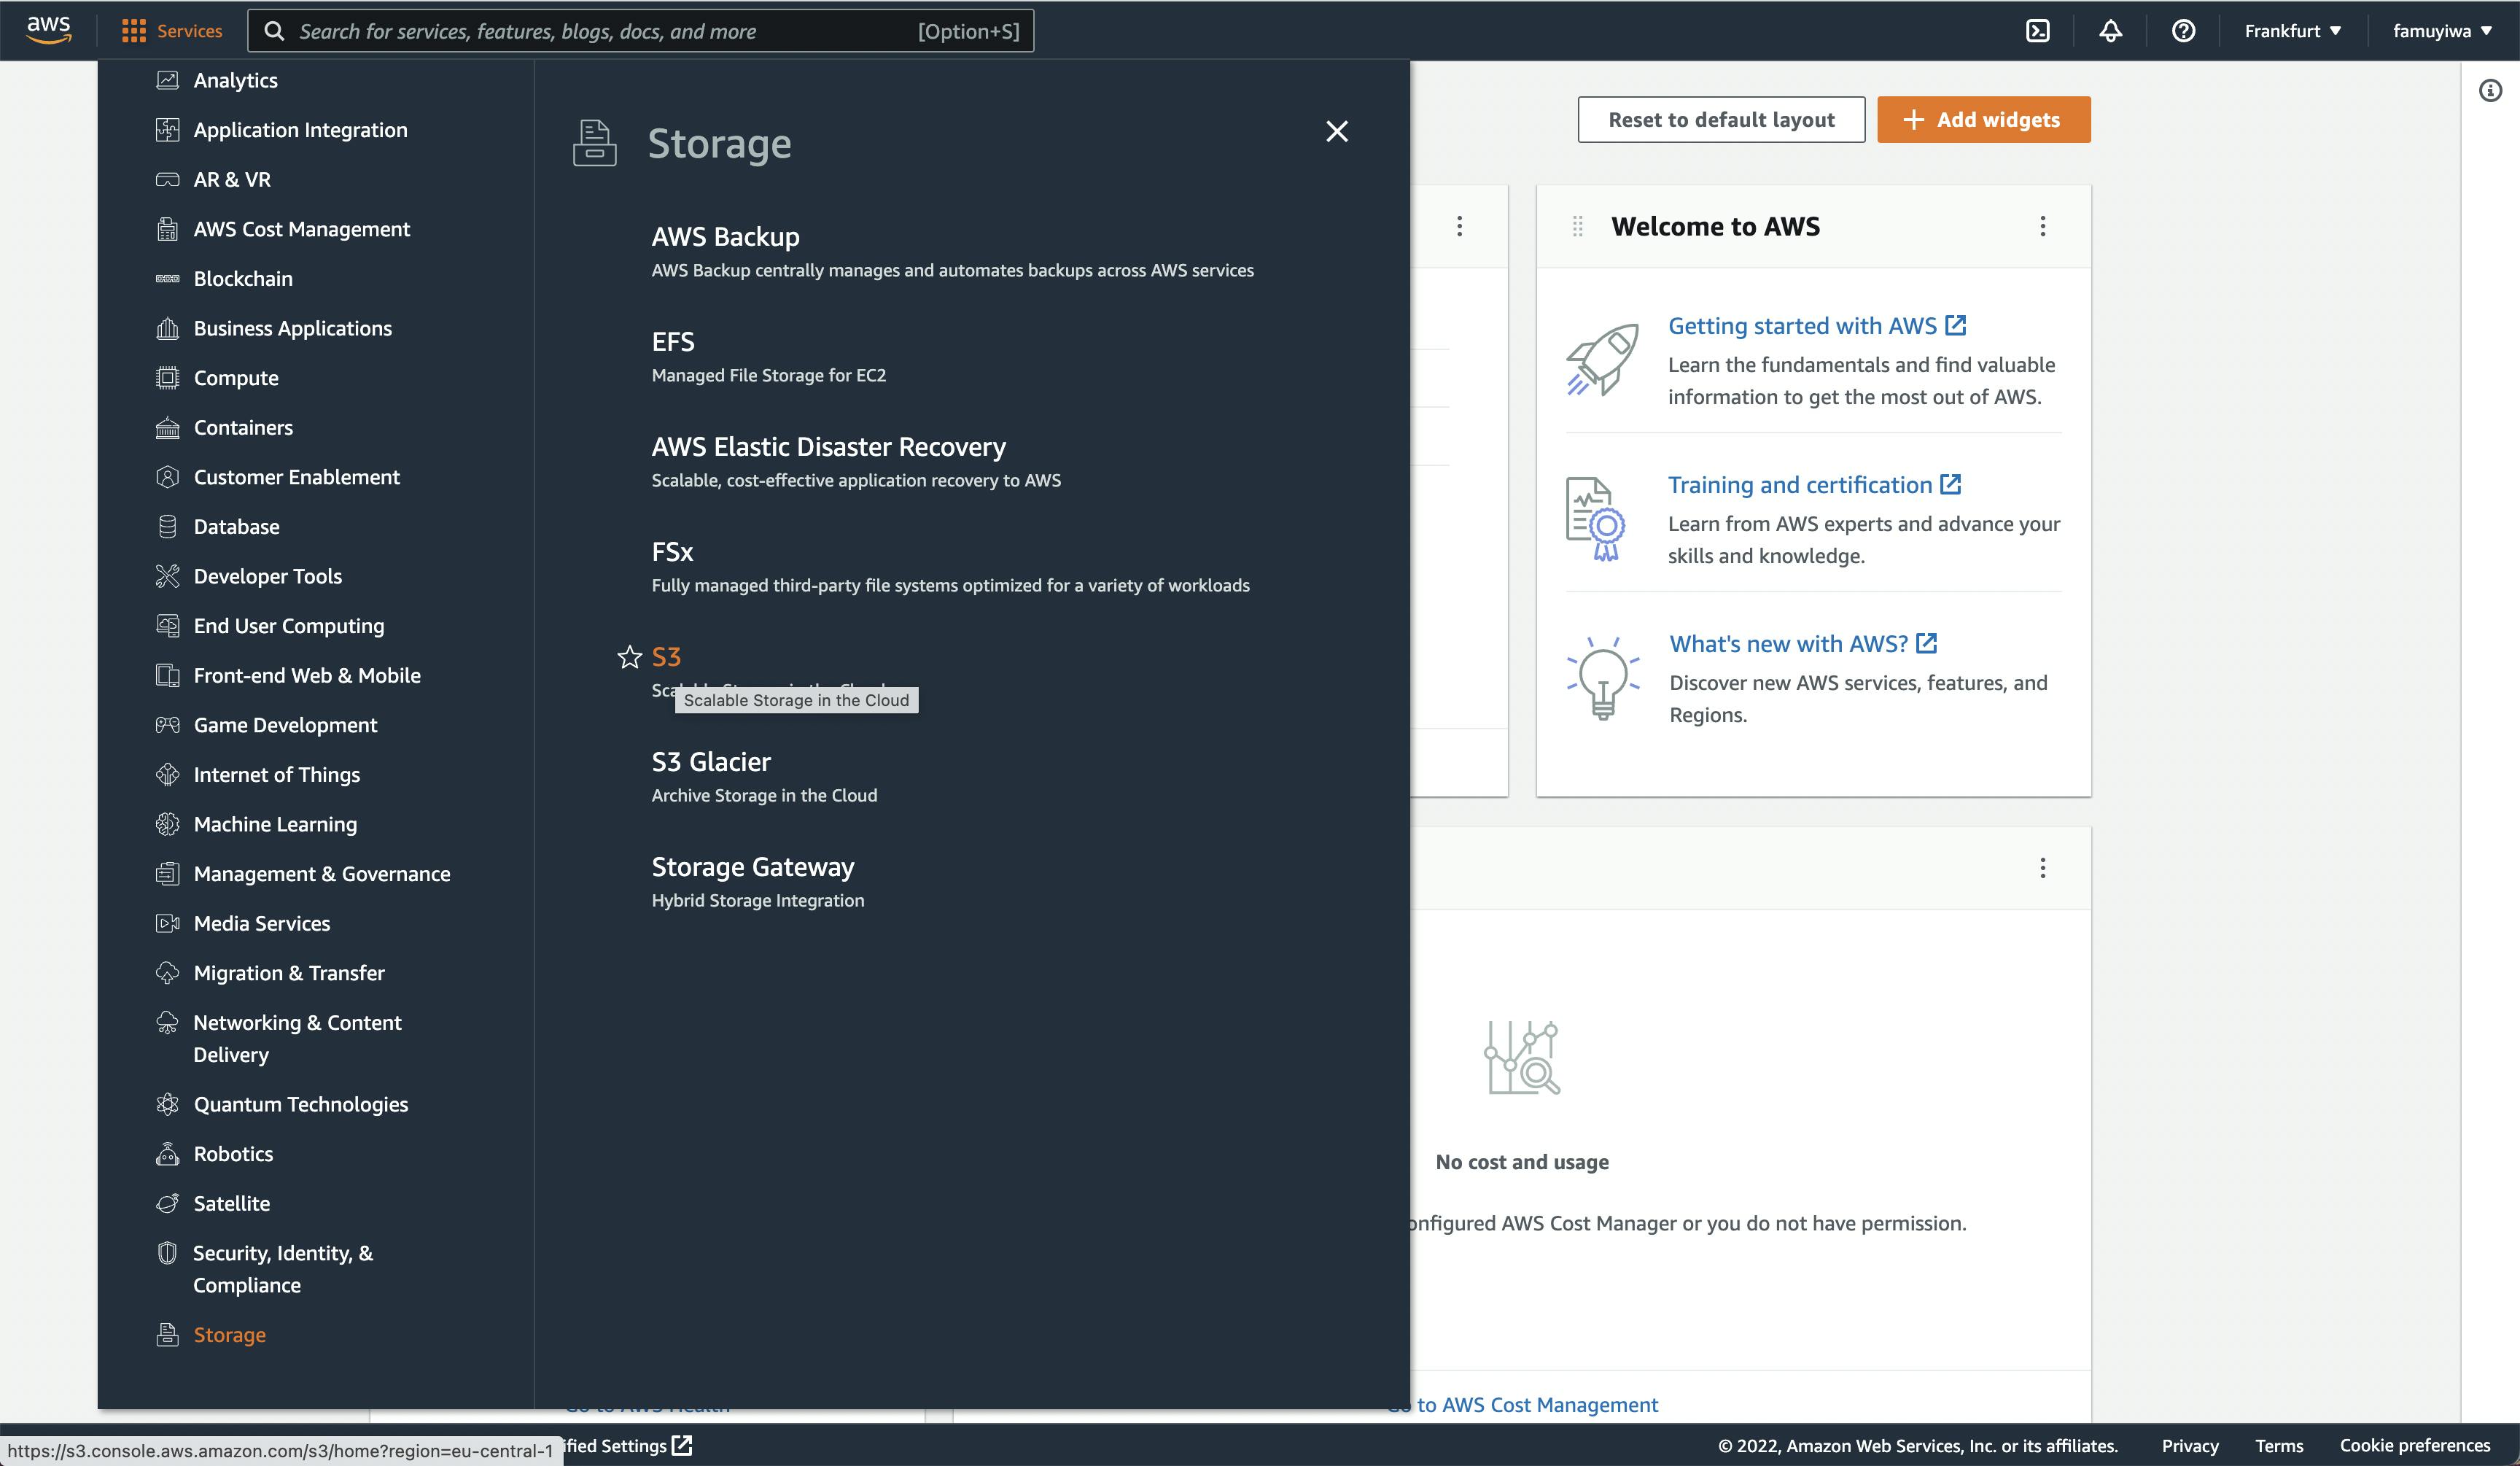
Navigate to the top left corner in the dashboard and click the services button next to the AWS logo, scroll down and click on storage then select S3 or use the search bar to search for S3
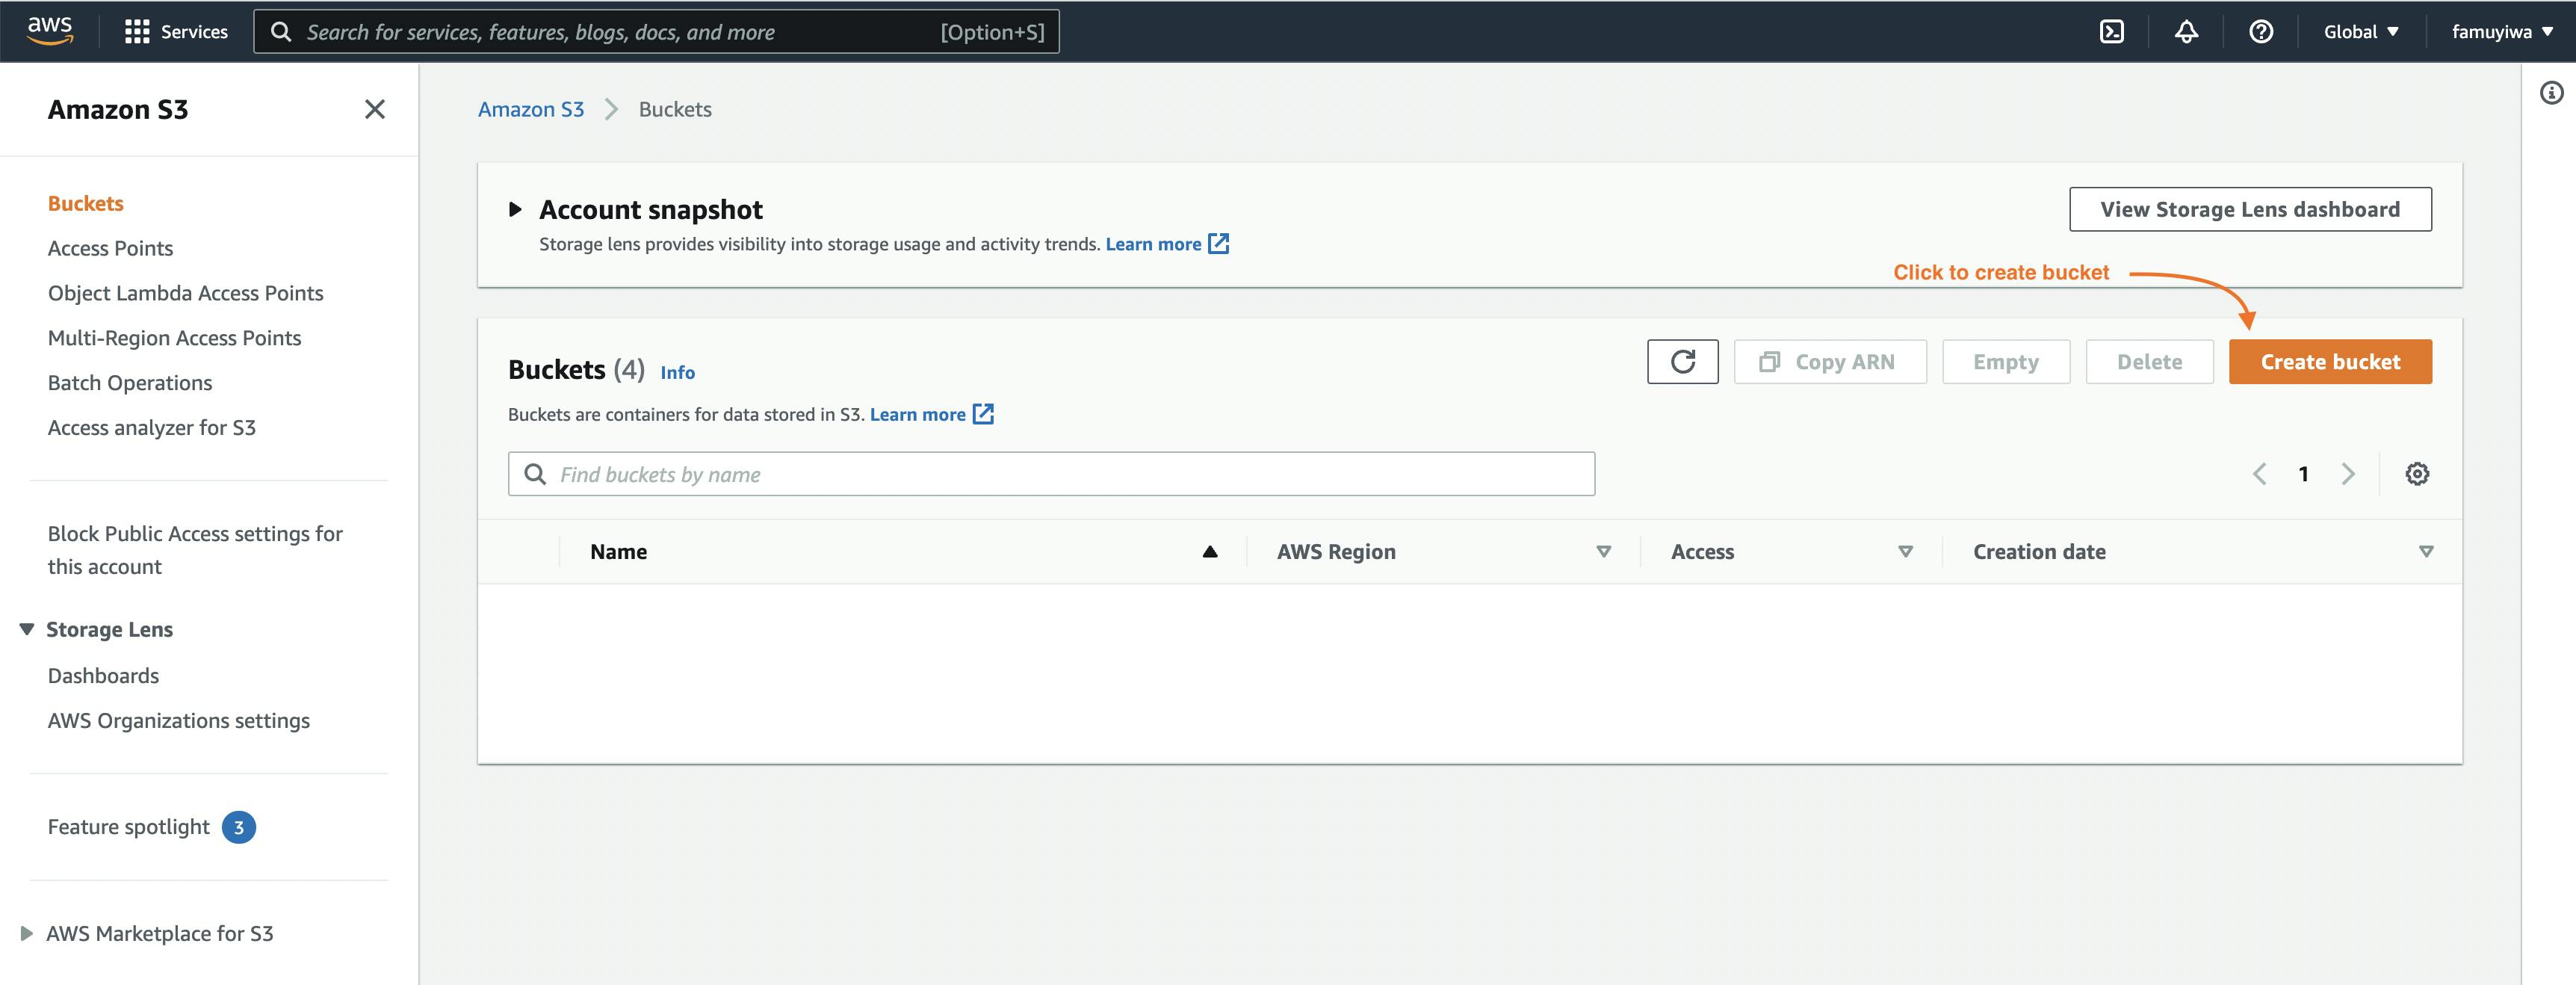
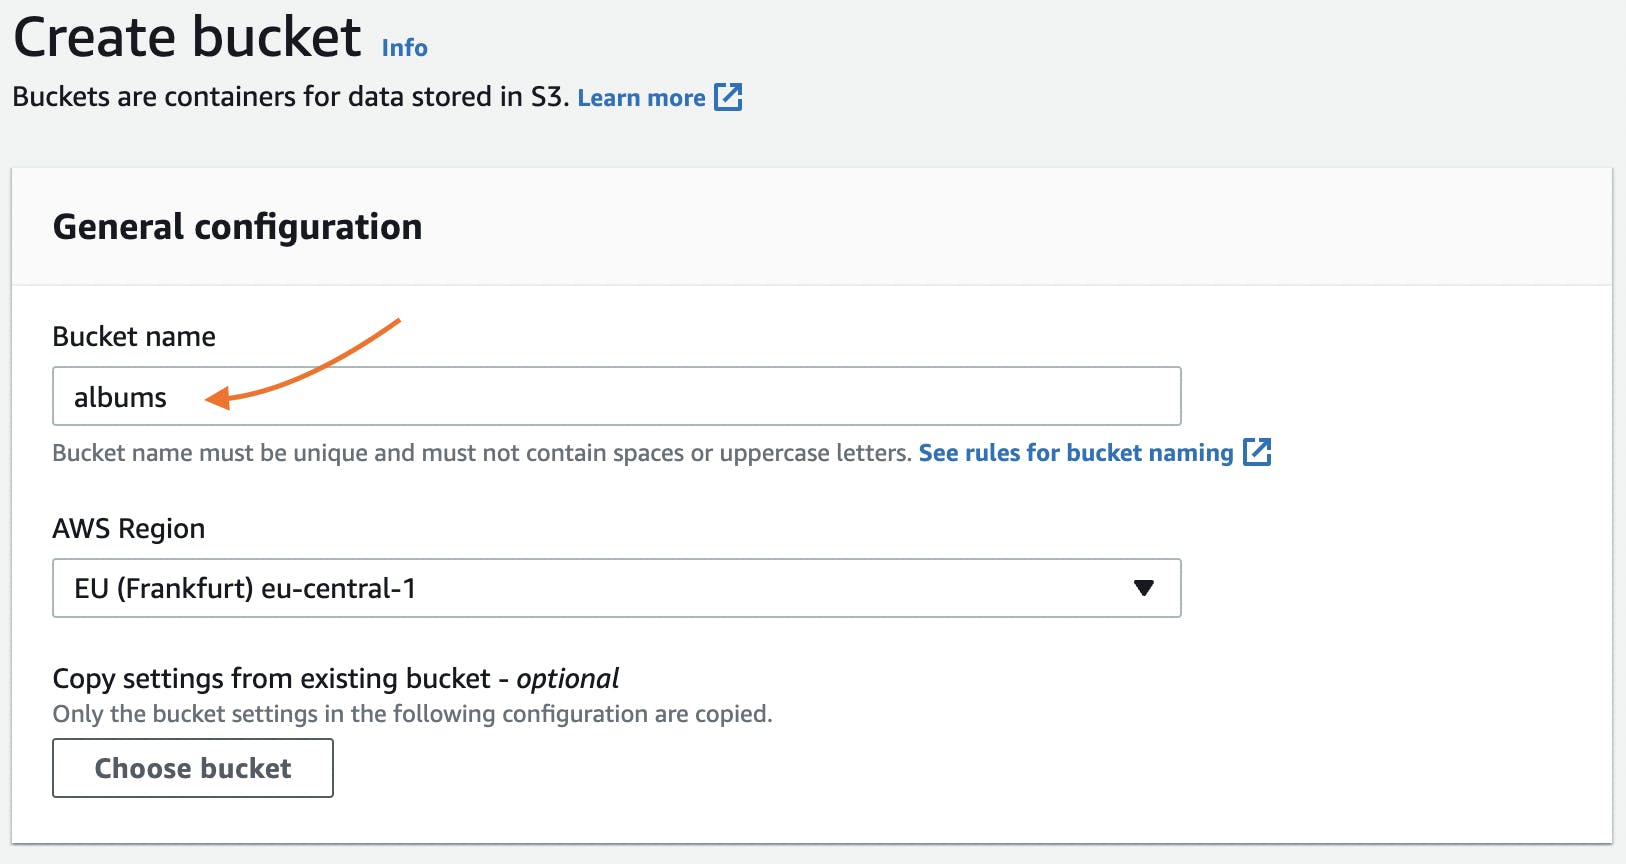
Create Bucket
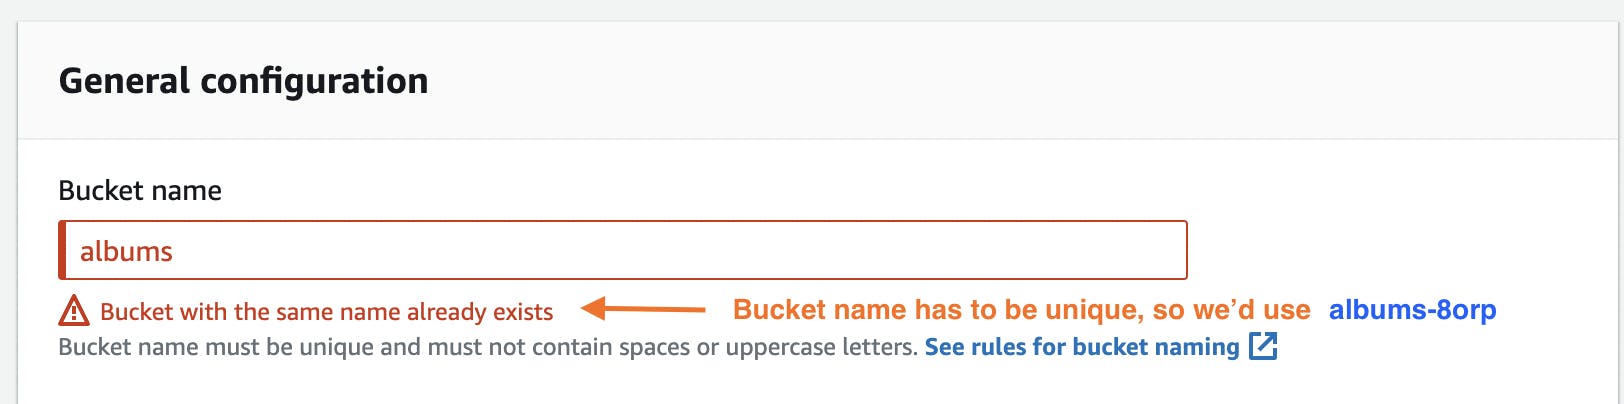
The bucket works like a folder to group files specific to a project, suppose you are working on a project that lets you view your albums, we could call the bucket albums since the bucket behaves like a folder that lets you put, get or delete images in the albums folder.
The AWS Region options allow you to select the region where the bucket will be hosted, It's best practice to select the one closest to you. It is also important to take note of the region as it'd be needed later on, don't worry you can still get it when you view the details of the bucket after you created it.
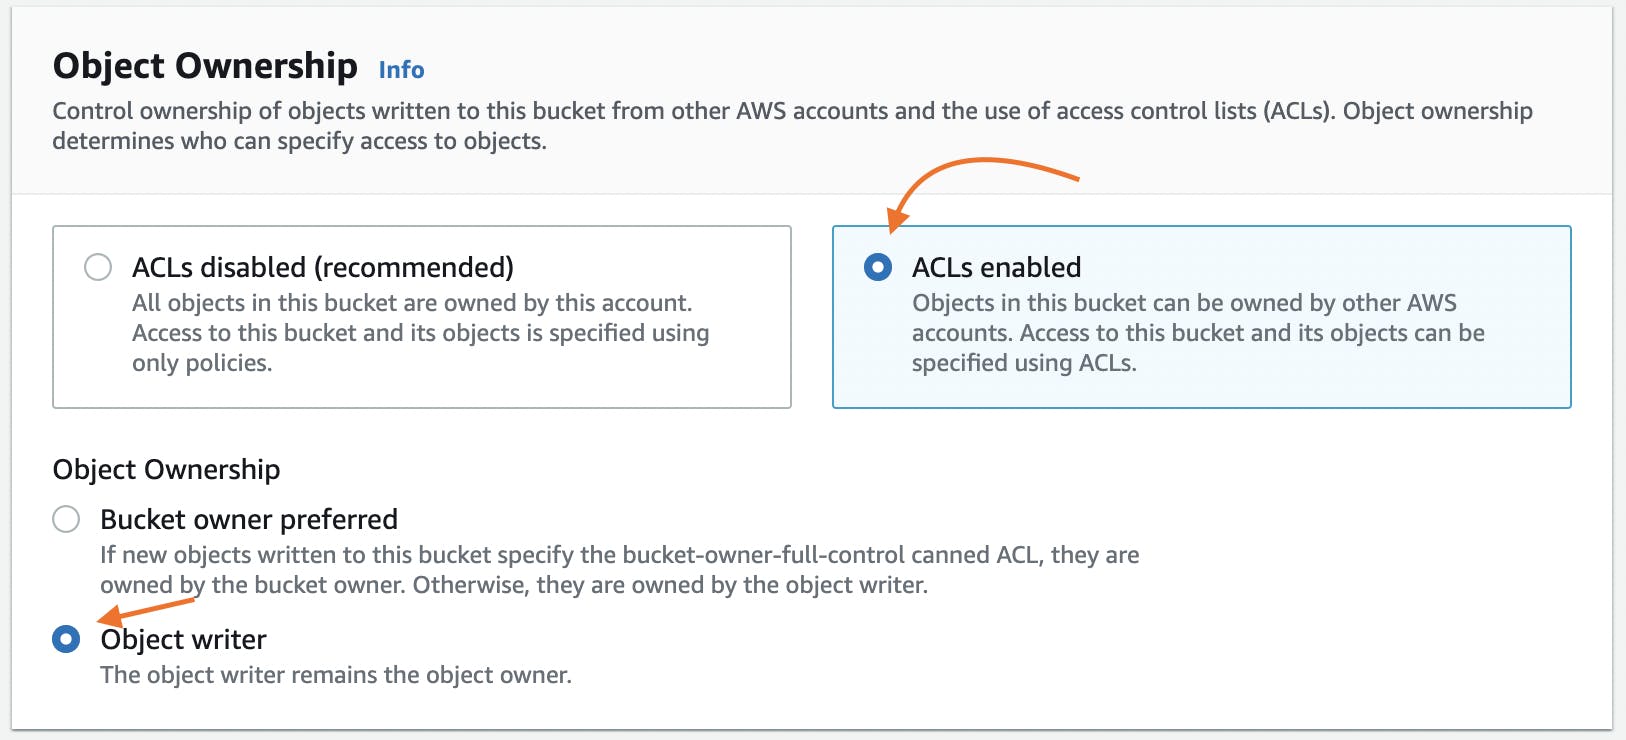
Let's enable the ACL and set Object ownership to Object writer, This is quite straightforward, When we enabled ACL we tell AWS S3 to allow us to define the access controls by ourselves using JSON as the definition language, and setting object ownership to Object writer means whoever has the access to put a file in the albums bucket owns that file.
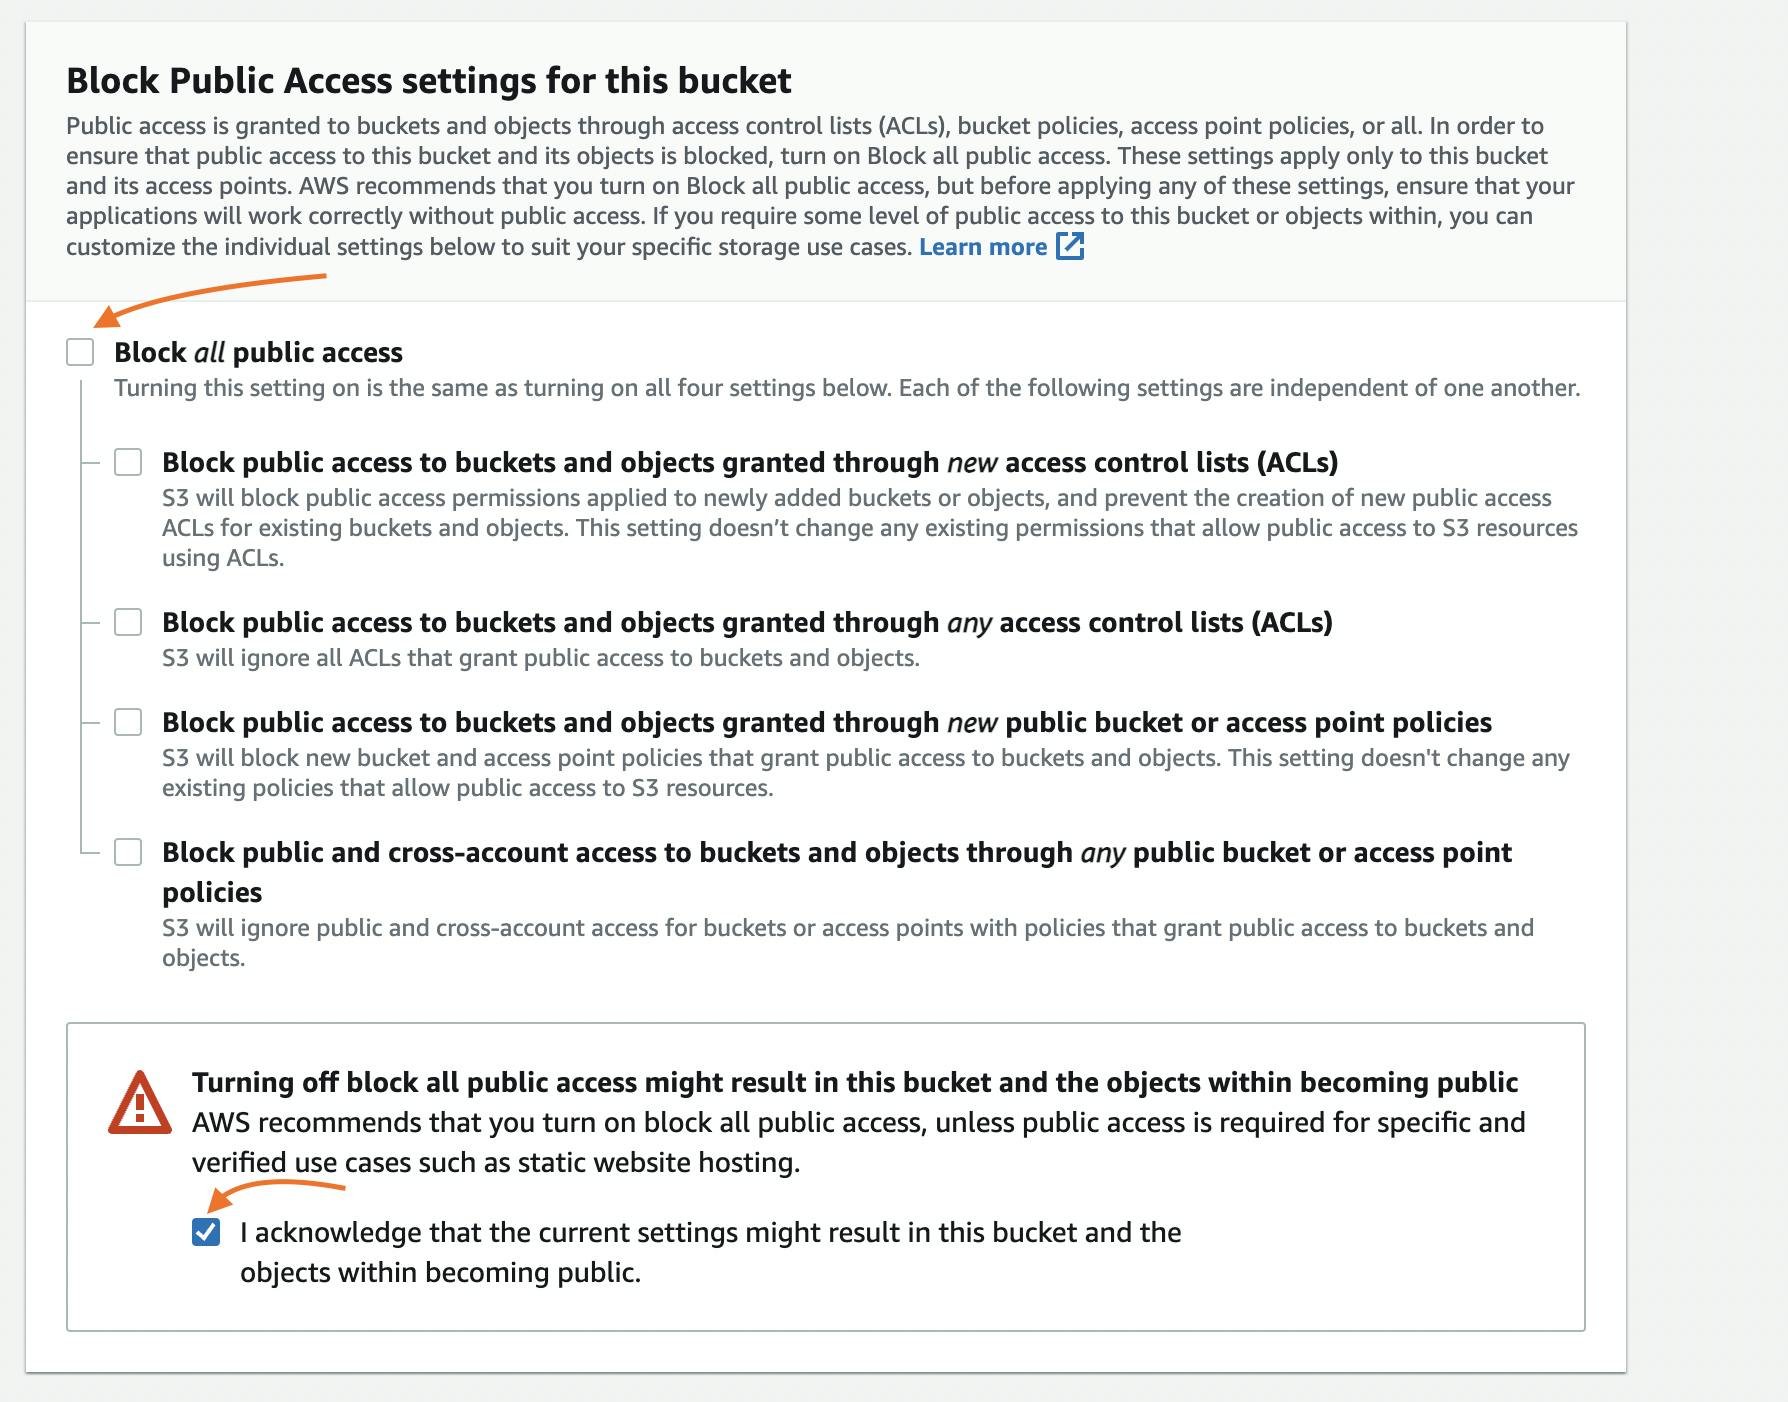
Since we'd be using ACL to control who has access to get, put, or delete from and to our bucket, we can deselect Block all public access and check the acknowledge checkbox to confirm we know what we are doing.
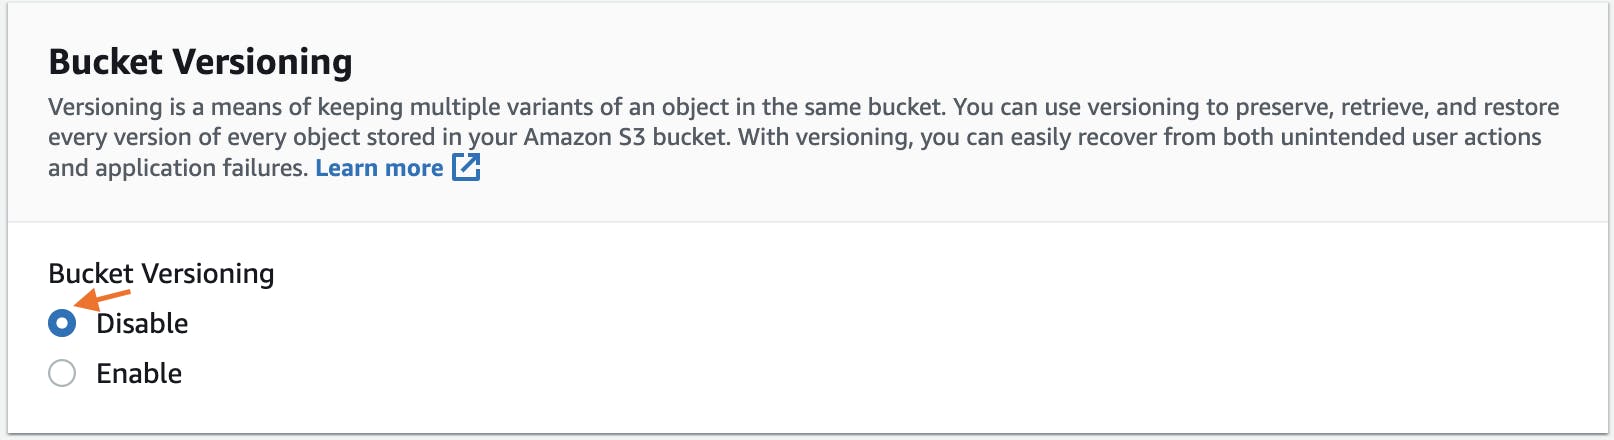
Bucket versioning helps you keep multiple variants of an object in the same bucket. You can use versioning to preserve, retrieve, and restore every version of every object stored in your Amazon S3 bucket. With versioning, you can easily recover from both unintended user actions and application failures, but we'd disabled that for this tutorial, enabling versioning is totally up to you. Read Using versioning in s3 bucket to learn more.
That's just about all the basic setup we need to create our albums bucket, you can skip through the rest of the settings. I'd advise checking the s3 documentation to further understand the advantage of setting tags, default encryption, and using the advanced settings.
Read Using cost allocation S3 bucket tags to learn more about the s3 bucket tags settings.
Read Default encryption to learn more about the default encryption settings.
Read Advanced Setting to learn more about using the advanced settings.

We've created an s3 bucket, now we need to set up ACL and create an access key and secret to upload files from our react app.
